
You can walk a field a hundred times, and unless you know what to look for, you might still miss most of what’s happening just below the surface.
Under your boots, an entire ecosystem is hard at work. Rove beetles and centipedes zip through the litter layer like tiny slinky weasels, feasting on smaller invertebrates. Isopods, “roly polys” to generations of delighted midwestern children, keep their heads down while on cleanup detail, munching on decomposing plant material. White grubs, the larvae of scarab beetles, spend years eating the growing tips of plant roots just below the soil surface. Tinier than all of these, springtails—barely visible to the naked eye—lead inscrutable lives in the upper inches of topsoil, where they consume fungal threads, bacteria, microscopic worms, and organic debris. These soil-dwelling invertebrates are indicators whose presence (or absence) can reveal a great deal about how your soil is functioning.
If you’re a farmer or gardener, you already understand that healthy soils are essential to your plants’ growth. Soil quality indicators (SQIs) are grouped into three categories: physical, chemical, and biological. While lab tests are helpful for measuring SQIs such as pH and bulk density, something as simple as a plastic cup buried in the ground can give you valuable insights into your soil’s biological health.
Pitfall traps offer a simple, replicable way to observe soil invertebrates. Unless you design the experiment carefully and measure repeatedly, pitfalls probably won’t give you population estimates or statistically rigorous data, but they will give you a snapshot of which organisms are present and how they vary across different parts of your farm or garden. You can use them to compare biodiversity across management zones (e.g., tilled vs. no-till beds, annual vs. perennial beds, native vs. non-native plantings) or to monitor the presence of beneficial insects or plant pests.
Pitfall traps are useful for tracking how your soil health management, integrated pest management, or conservation practices might be influencing invertebrate life over time. They help you start asking: What kind of habitat am I creating? Who’s thriving here? Who’s missing?
Sampling Soil Invertebrate Life at Brown County Extension
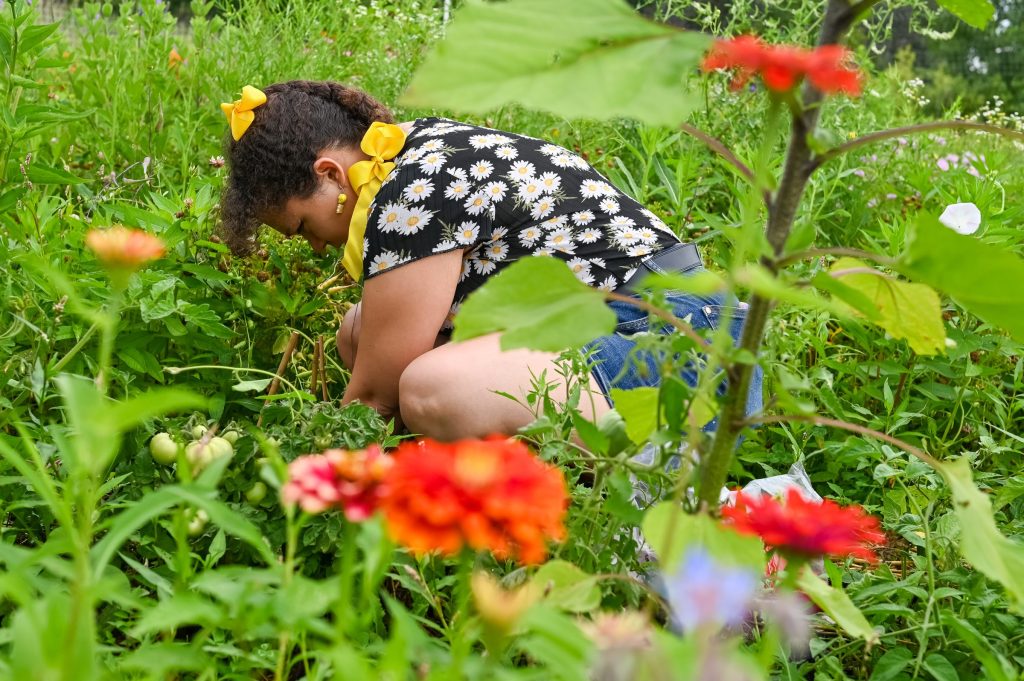
To put the pitfall trap method into practice, our team set up pitfall traps at several community garden sites managed by the UW-Extension Brown County team.
This method comes from the Xerces Society, whose work on beneficial insects and soil biodiversity has shaped how we think about conservation and land stewardship. Their Soil Scouting Guide offers a simple, replicable method for setting up pitfall traps to observe invertebrate life in the soil.
For our sampling, we chose a mix of community garden plots—some tilled, some no-till, some raised beds, some in-ground. We also sampled two perennial garden beds outside the Extension office: one planted with native wildflowers, the other with non-native roses. Each site represented a different management style, and each trap offered a glimpse into the invertebrate life those styles support.
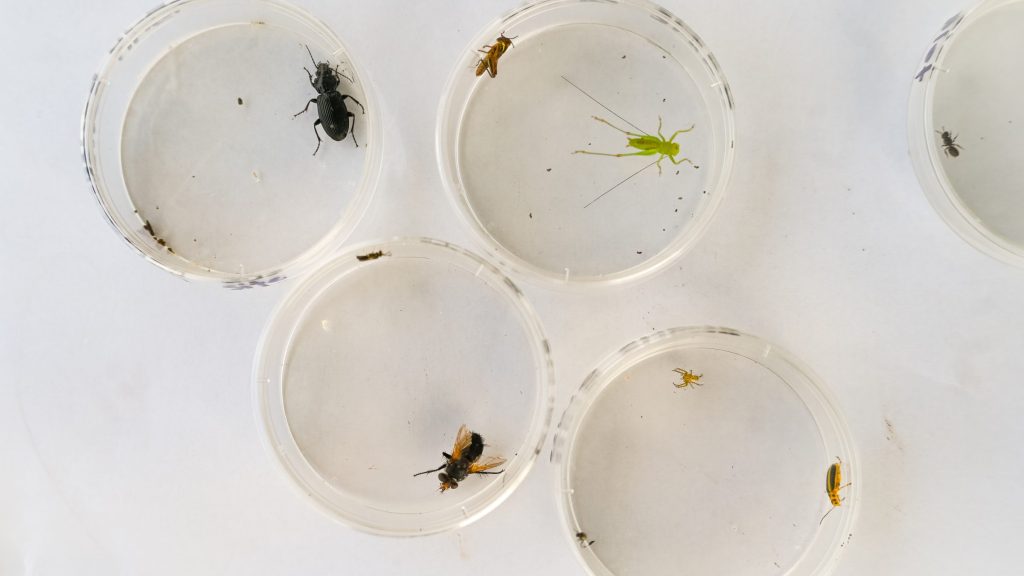
We took our samples over to Sunset on the Farm, an annual field day hosted by the Lower Fox Demonstration Farm Network, and used a hand microscope to explore our samples with the community members, farmers, and conservation professionals who attended the event.
The activity sparked meaningful conversations—people were curious, engaged, and often surprised by the variety of life found just beneath the surface, especially the kids. It was a fun and hands-on way to connect soil health with biodiversity and to highlight how simple tools can reveal complex ecological stories.
How to Set Up DIY Pitfall Traps
To try it yourself, you don’t need much—just a few basic materials and a bit of time. Pitfall traps are low-cost, low-tech, and easy to replicate across different farm plots or areas of your garden.
Materials
- Plastic cups (8-12 oz works well)
- Trowel or soil knife
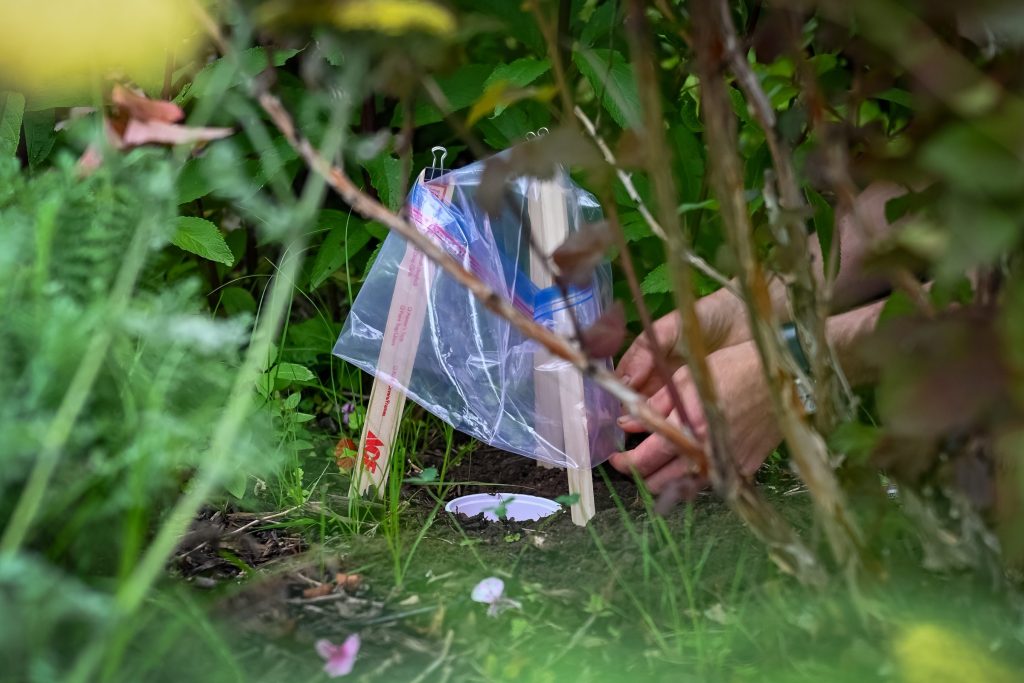
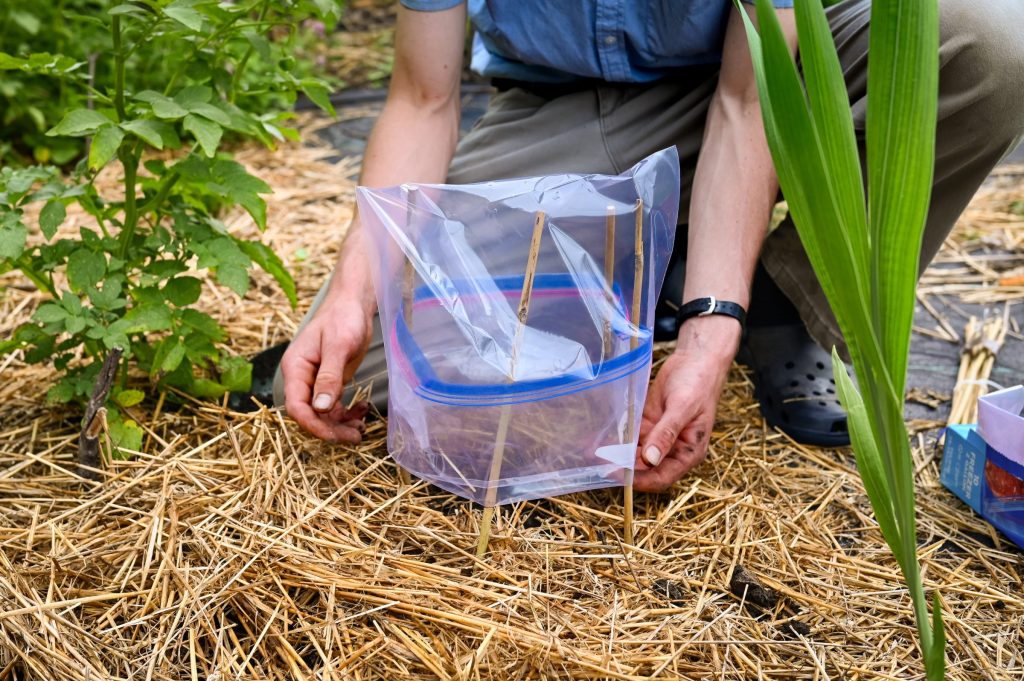
- Rain cover (e.g., small plate or zip-top bag) to protect the trap from rain and debris
- Sticks or small rocks to prop up the rain cover
- Binder clips, tape, or some other way to secure the rain cover
Setup
- Choose your sites. For best results, set up a few traps in a variety of sites at least 20 feet apart.
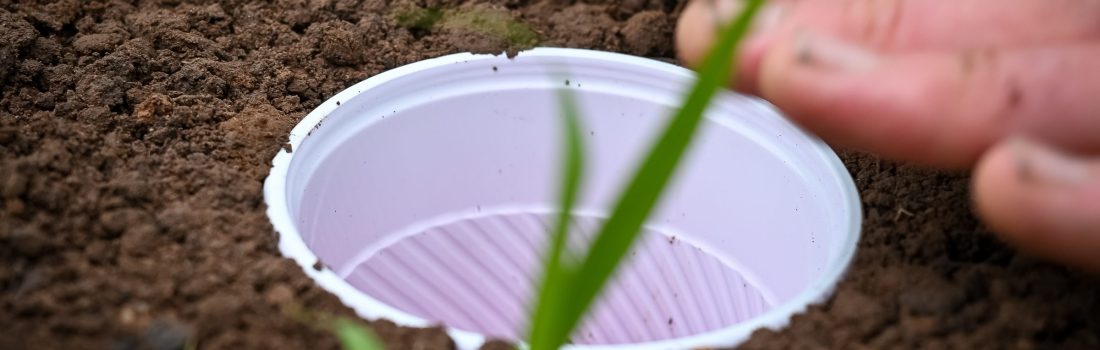
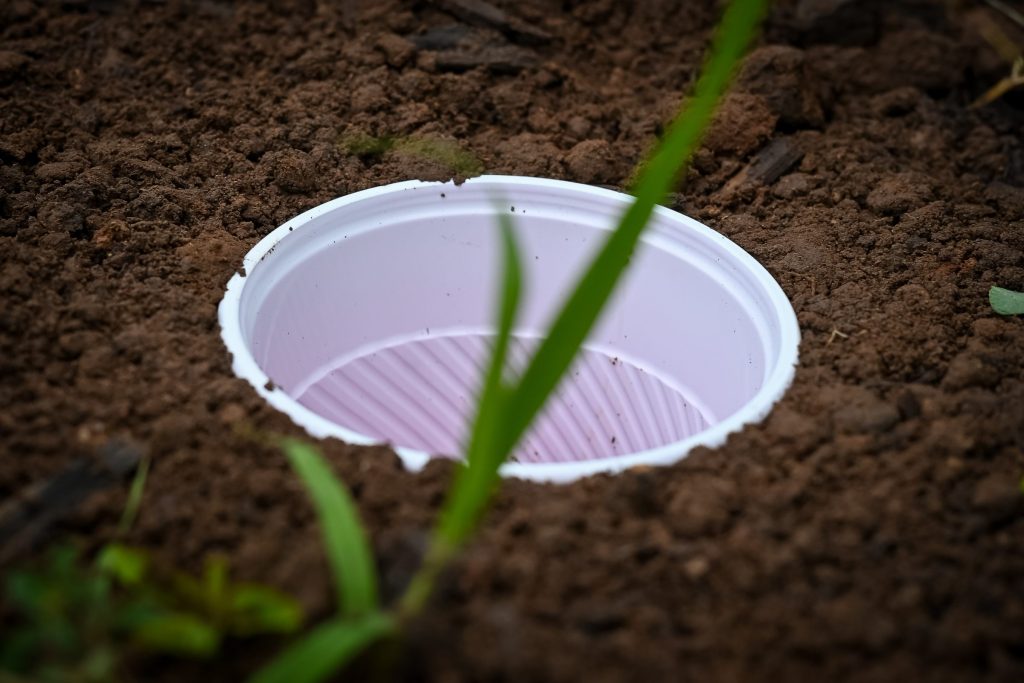
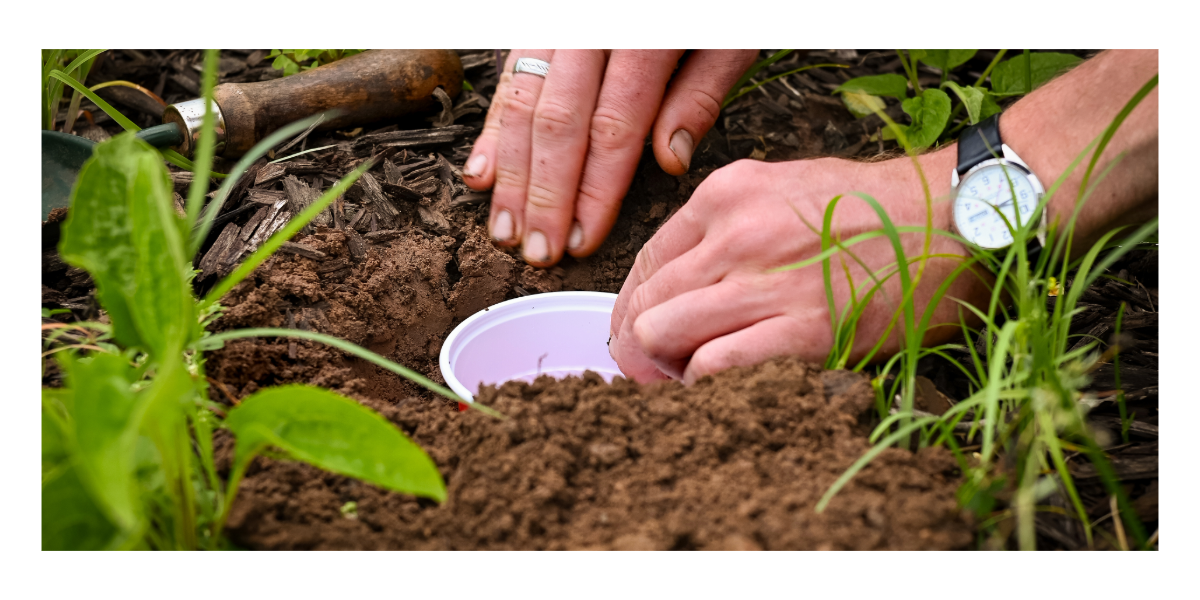
- Use a trowel to dig a hole just deep enough to sink the cup so that its rim is flush with the soil surface.
- Place the cup into the hole and pack soil around the sides so the rim is level with the soil surface—this makes it easy for insects to walk in and fall into the trap.
- Position a rain cover a few inches above the trap to keep out debris and prevent the cup from flooding, using sticks or rocks to prop it up. Secure the rain cover in place.
For our rain cover, we used 3-4 plant stakes positioned around the cup, then a zip-top bag over top. We secured the bag to the stakes with large binder clips.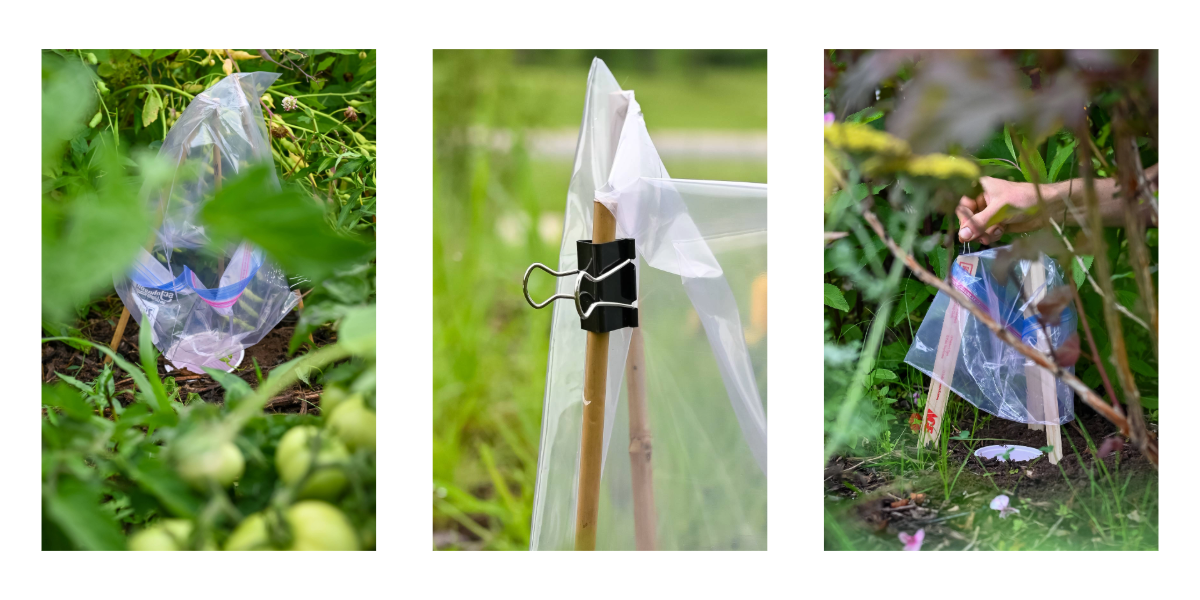
- Leave traps out for 24-48 hours before collecting your samples.
Tip: Avoid placing traps on very hot or rainy days. Extreme weather can reduce insect activity or even damage your traps.
Observation
Once you retrieve your traps, examine what you’ve caught. Even without a microscope, you can make meaningful observations. A hand lens, insect ID guide, or even a phone camera can help with closer inspection.
- How many different kinds of insects do you see?
- Are some sites more diverse than others?
- What might that say about your soil conditions?
Give pitfall traps a try! What (and who) you find might change how you think about your soil.
Note
A major difference between our practice of setting out pitfall traps for casual “demonstration” sampling and how most entomological research would be conducted is that we chose to release the insects that fell into our cups. If you are a researcher in need of accurate data on exactly what falls into the cup and don’t mind (or even prefer) picking out dead bugs versus dealing with live ones, add about two inches of dilute soapy water to the bottom of the trap. The soap cuts surface tension and insects drown quickly at the bottom.
The MUD Farm Network team doesn’t recommend wantonly killing insects, but, of course, farmers understand that most agricultural activities inadvertently or deliberately kill insects, and those sacrificed for legitimate scientific or teaching purposes fall within the same ethical logic. Still, our team feels that if we can prevent the unnecessary deaths of these residents of the soil community, then we should. At the end of the event, when all the kids and parents go home, it’s a nice feeling to shake out sample containers and wish the insects well as they scurry back to the soil.
Photos by Meag Sargent.